Posted on•3min
How the bottom scoop helped us scale the Jointlocker
Get the inside scoop on one of the most important updates to date...
There are 0 items in your cart.
Similar to our learnings about the lighter fit and grip fins, we had a few more coming our way during the production of the Jointlocker 1.0.
We learned that the bottom surface was causing concerns when being auto–ejected from the print–bed, and it was something that would slow down our process altogether – from spending more time with quality control, to needing manual intervention (human using their own two hands to remove the Jointlocker from the print–bed).
Yes we were still able to produce the Jointlocker 1.0, but at a slower pace than was reasonable or scalable. So if we wanted to continue larger print runs of the Jointlocker, we needed to utilize auto–ejection.
No idea what auto–ejection is? We didn’t either! Let us enlighten you with our newly discovered knowledge.
Auto–ejection is a setup designed to simplify the post–printing process. Once a 3D print job is complete, the auto–ejection system comes into play, and typically involves a movable platform or bed where the printed object is created.
After the printing process is finished, the platform may lower or move in a way that assists in detaching the printed object from the 3D printer's build surface. This can involve tilting or shifting the platform to facilitate the easy removal of the object.
The goal is to automate the separation of the printed item from the printing surface, streamlining the workflow and making it more efficient by reducing the need for manual intervention, and allows for a smoother transition between prints. It also enables the printer to prepare for the next job without requiring immediate attention.
Truth be told we weren't sure where to start, but something needed to change to make it all happen. And we needed to do it while maintaining the structure and aesthetics of a Jointlocker.
So after many conversations and ideas, our manufacturer shared an option with the bottom scooped out, and just enough of an edge for the product to still stand up right. We were intrigued, and so we began the iterative process. From how much the scoop is scooped, to how thin or thick the outer edge needs to be. It was a lot.
Fast forward through iterations, emails, samples, and test prints, and we finally landed on the bottom scoop you see on the Jointlocker 2.0 below. Not only does it allow us to use auto–ejection without issues, but it reduced our material usage by 28%, and gives your finger a natural resting spot when using the Jointlocker. We call that a win–win–win.
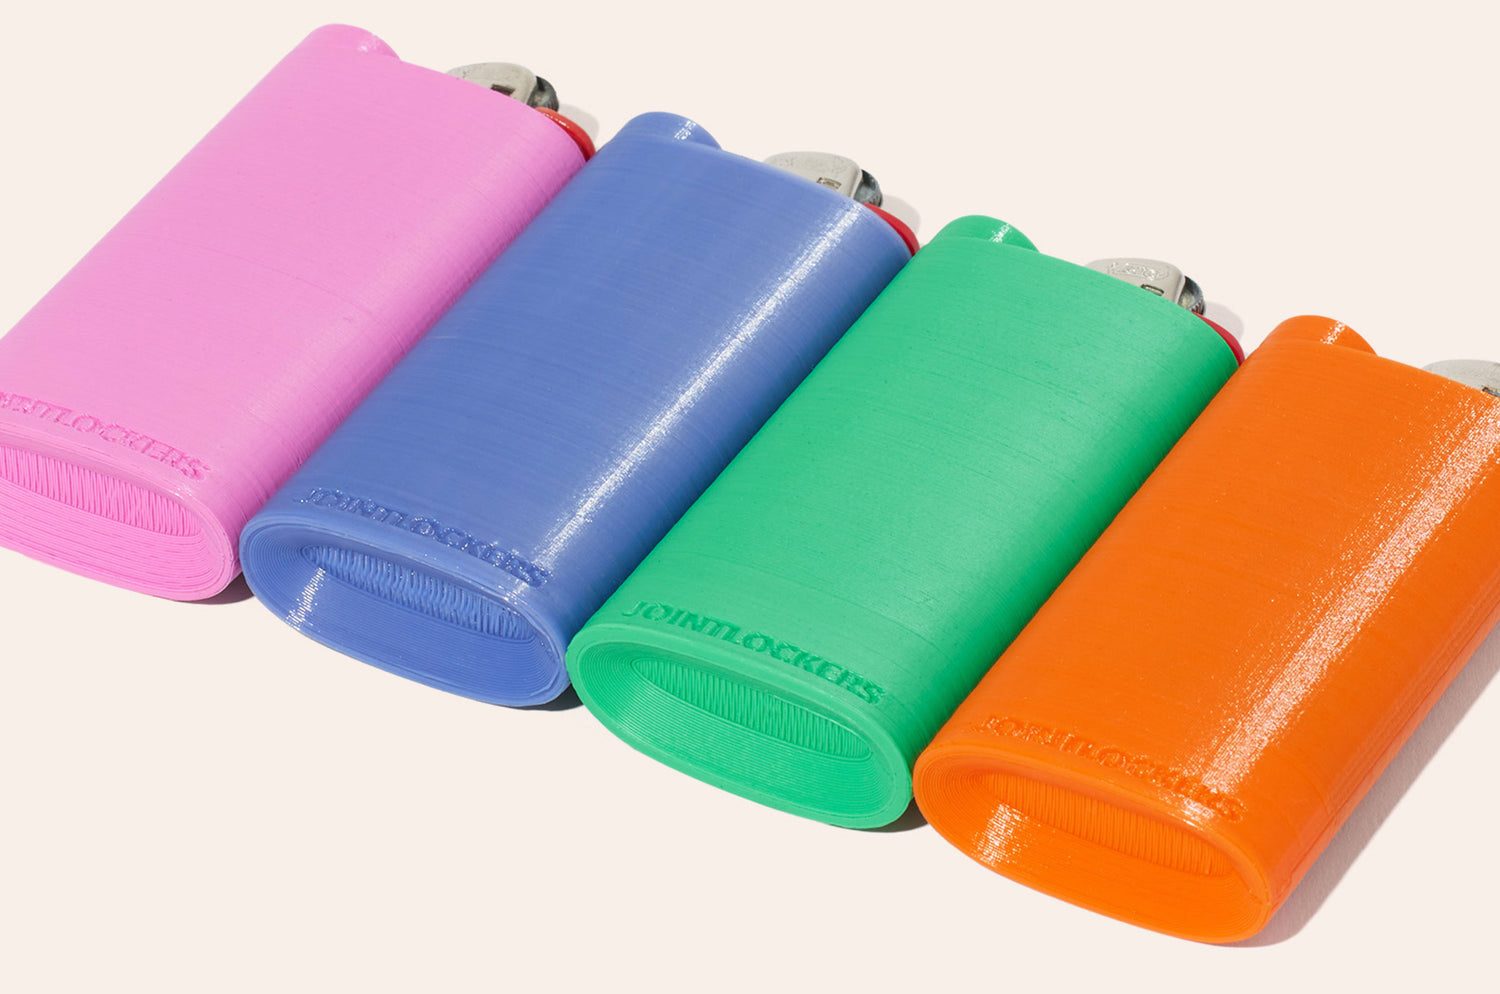
Photo Caption: Bottom scoop seen on the Jointlocker 2.0
If you want to totally geek out on how and why the design of this scoop works for scaling a product, look no further than this link.
Curious about plant–based plastic? Keen to know why we’re 3D printing instead of injection moulding? Unsure what a grip fin is? Have no idea what any of that means?
2min
There are so many reasons we love it. Learn more here...
2min
It has nothing to do with sharks! Learn more here...